Hand Laid Turnout Tutorial
Page 11
The Final Page
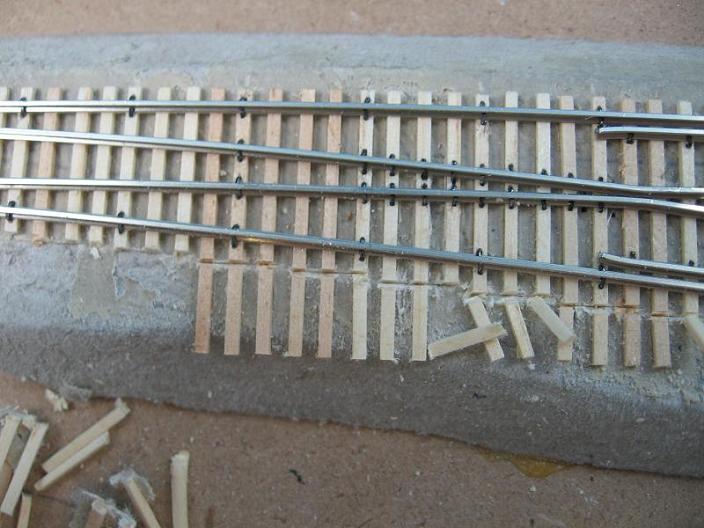
Now we'll cut off the ties that are sticking out. This process doesn't have to be exact, unless you want it to be. I've done so many now that I just eyeball it. You can take your paper template and follow that until you get to know where to put the cuts in at.
I take and use a cut off disk in the motor tool to get most of the cuts, and then go back and use the Xacto blade to finish them up and pop the cut ends from the glue. After painting and ballasting, any imperfections with the tie ends pretty much disappear.
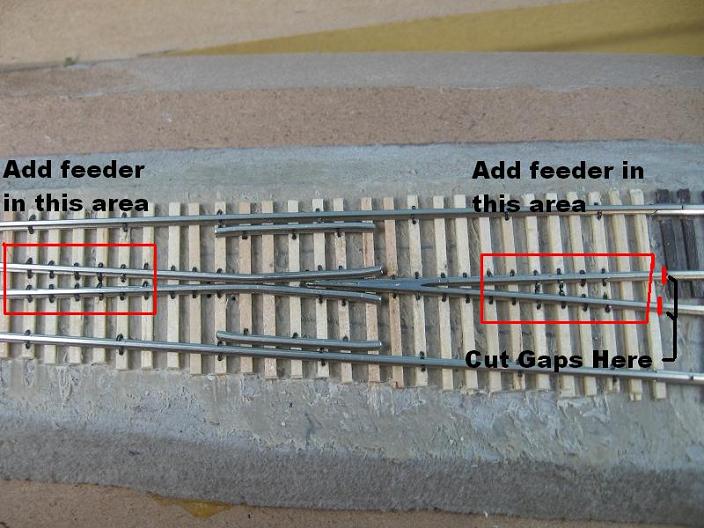
With the turnout now looking more like a turnout, we'll finish wiring up the closure rails and frog.
We'll need to cut 2 gaps in the frog point rails, or you can not put a rail joiner on them, that's up to you. I just skip the rail joiner. To keep the rails from touching, I put a small piece of thick paper between them and glue it it place. Those small subscription flyers that fall out of magazines are perfect for this. The paper/superglue combination prevents any current from getting through and making a short. With the rails isolated, I drop a feeder down anywhere in the spiked area, but don't get too close to the frog point, as we don't want the solder to heat up and move on us.
With the closure rails, I put a feeder in the spiked area. It doesn't matter which rail you put one on, since the throwbar keeps the current going between them.
I then connect these 2 wires together and run them to one of the SPST's on the tortoise switch machine. If you are using another form of switch machine, just make sure that the frog/closure rails are wired for the correct polarity when thrown to each route.
To reiterate about the cut areas on the throwbar....
The small gaps that are cut into the throwbar next to the closure rail points will stop the power from going to the stock rails and causing a short.
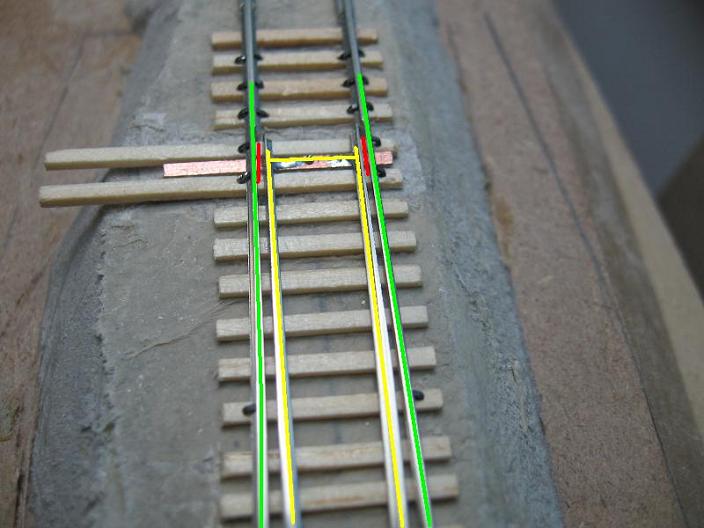
When the turnout is thrown, the closure rail points make contact with the stock rails and the feeders under the layout are now connected via the tortoise switch machine, and power is sent throughout the turnout.
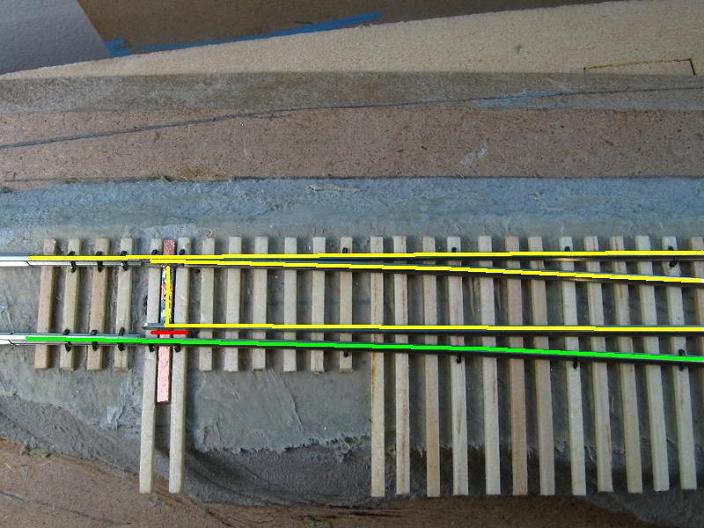
The important thing that needs to be done (and I stressed this before) is that the locomotive wheels or car wheels can not touch the opposite closure rail when passing through the turnout or it will short. This is why I move the closure rails in far enough to clear.
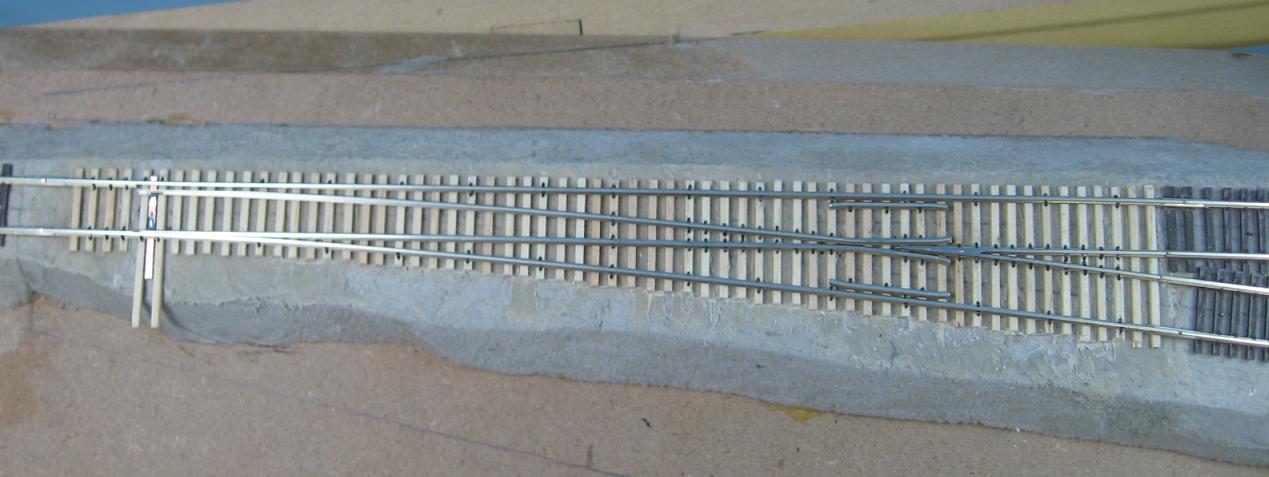
Here is the completed #10 turnout ready for paint and ballast.
All material on The Owens Valley Subdivision website is Copyright 2007-2009 by Michael Stoner. None of the material (including text and photographs) on this web site may be reproduced in any form without prior written permission.